

Over in Part I of this two-part article, we investigated sharing tools/apps/utilities using Brew. Now in Part II, we’ll complete the solution by automating away the chore of creating releases ourselves with GitHub Actions.
Automate releases with GitHub Actions#
GitHub Actions is a continuous integration and continuous delivery (CI/CD) platform. It allows developers to automate the build, test, and deployment pipeline for their applications directly from their GitHub repositories. We can use GitHub Actions to automate some of the chore, so that we can better spend our time on developing our tools instead.
Fortunately, GitHub Runners come pre-installed with the GitHub CLI and Ruby.
Brew Formula File Template#
To automatically create our Brew formula file, we need to convert it to a Ruby Template that we can call as part of the workflow. Below you will find an example for the joke app.
Filename: joke.erb
class Joke < Formula
  desc "Prints a random joke on the command-line"
  homepage "https://github.com/chris-gillatt/homebrew-joke"
  url "https://github.com/chris-gillatt/homebrew-joke/releases/download/v0.0.<%= ENV["GITHUB_RUN_NUMBER"] %>/joke-0.0.<%= ENV["GITHUB_RUN_NUMBER"] %>.tar.gz"
  sha256 "<%= `sha256sum dist/joke-0.0.#{ENV["GITHUB_RUN_NUMBER"]}.tar.gz | awk '{printf $1}'` %>"
  version "0.0.<%= ENV["GITHUB_RUN_NUMBER"] %>"

  depends_on "curl"
  depends_on "figlet"
  depends_on "cowsay"
  depends_on "lolcat"
  depends_on "coreutils"

  def install
    bin.install "joke"
  end
end
As you can see, most of the file is the same as before, with a few key differences:
- The file extension is now
erbrather than.rb. - On lines 4-6, we’re extracting the built-in GitHub Runner variable
GITHUB_RUN_NUMBERand using the Ruby template file to substitute in their values. This handles the automatic incremental versioning with each push to our repository.
NOTE - There is a gotcha here. If you’ve been following this guide throughout, you will already have version 0.0.1 of your app published as a release in GitHub. The value of GITHUB_RUN_NUMBER starts at 1 so the first run of the workflow will fail. You can either run the workflow again until GITHUB_RUN_NUMBER becomes higher than your latest version number of your app, or increment the minor version of the app in the template, such as 0.1.1. You could also write a bit of bash that performs some maths to ensure that the version number is where it needs to be and place it in the workflow.
Identity and Access Management (IAM)#
Not so long ago I would have recommended creating a GitHub Personal Access Token (PAT) and placing it into a secret to be read by the CI/CD system of choice. However, I’ve discovered a more elegant solution in the form of simply granting write permissions on our repository to the workflow via the GitHub Runner (the term for a worker agent of GitHub Actions).
This conveniently avoids the need to create and manage a PAT or SSH key to allow the committing of new files back to our repository. GitHub hosted runners are ephemeral only shared with other members of the same organisation. They’re created for the job they are allocated for and are destroyed on completion, so they should be more than secure enough for our personal projects. For the purposes of organisational use, you can always deploy your own self-hosted GitHub Runners and manage them internally, as the runners themselves are Open Source!
Granting Permissions#
To grant permissions to the GitHub Runner, we need to change Workflow Settings
In GitHub, navigate to: Settings > Actions / General > Actions permissions / Workflow Permissions
Under Workflow Permissions, ensure the Read and write permissions is selected, and click Save.
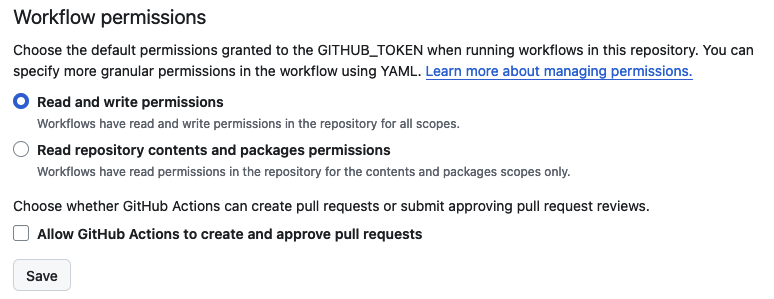
That’s it, unless you wish to further fine-tune this permission within the workflow file itself.
Git Config#
When working manually, our Git config is set up for our personal user that appears in the git logs. This as a minimum requires a name and email address to identify us. When shifting this responsibility to the GitHub Runner, we could choose instead to have it identify itself so it’s less confusing when looking back at git commits and the git log. This will make things easier to debug too if something goes wrong at a later date.
There’s a special user and email address that’s been created specifically for this purpose. We’ll use this in the workflow shortly.
"github-actions[bot]"
"41898282+github-actions[bot]@users.noreply.github.com"
Creating a Workflow#
A workflow in GitHub Actions terms is just a manifest file in yaml format that describes a set of actions. If you’re familiar with CI/CD principles (especially if you’ve used CI/CD platforms like Ansible) you’ll be right at home here. Within this file we tell GitHub Actions where to find our files and what to do with them to produce a result.
Workflows exist within the .github/workflows path, relative to your GitHub repository. You can learn more specifically about GitHub Actions, workflows etc via the official documentation.
Here’s an example workflow file for joke:
Filename/path: .github/workflows/ci.yaml
name: ci

# Controls when the workflow will run
on:
  # Triggers the workflow on push or pull request events but only for the master branch
  push:
    branches: [ main ]
  pull_request:
    branches: [ main ]

  # Allows you to run this workflow manually from the Actions tab
  workflow_dispatch:

# A workflow run is made up of one or more jobs that can run sequentially or in parallel
jobs:
  # This workflow contains a single job called "build"
  build:
    # The type of runner that the job will run on
    runs-on: ubuntu-latest

    # Steps represent a sequence of tasks that will be executed as part of the job
    steps:
      # Checks-out your repository under $GITHUB_WORKSPACE, so your job can access it
      - uses: actions/checkout@v4

      # Runs a set of commands using the runners shell
      - name: Create Release
        env:
            GH_TOKEN: ${{ secrets.GITHUB_TOKEN }}
        run: |
          # Use the GitHub Bot user for Git and GitHub IAM.
          git config user.name "github-actions[bot]"
          git config user.email "41898282+github-actions[bot]@users.noreply.github.com"

          # Specify name of app for packaging & distribution purposes; Compress to a tar.gz.
          export APP="joke"
          mkdir dist
          tar cf dist/"${APP}-0.0.${GITHUB_RUN_NUMBER}.tar.gz" "$APP"

          # Generate Brew formula file using the template file.
          erb "${APP}.erb" > "${APP}.rb"

          # Commit the new complete formula file back to the repository.
          git add "${APP}.rb"

          # Commit and push file to repository.
          git commit -m "$APP release 0.0.${GITHUB_RUN_NUMBER}"
          git push

          # Create and publish release to repository.
          gh release create v0.0.${GITHUB_RUN_NUMBER} ./dist/*.tar.gz --title "0.0.${GITHUB_RUN_NUMBER}" --generate-notes
As can be seen above, I’ve annotated the workflow and embedded script to explain what’s going on. As the script is only a few lines, I’ve chosen to write it directly in the workflow for repository simplicity. Should there be more work to do, I would place the script into a file of its own and call it separately as part of the run command.
NOTE - We already gave permission to the workflow (via the GitHub Runner) to be able to commit back to the repo as part of Identity and Access Management (IAM) above. However, this does not grant permission to the gh (GitHub CLI) app. Therefore, we can use the existing permission by reusing its credentials as can be seen on lines 28-29 (highlighted). A GitHub runner has its credential stored automatically inside variable GITHUB_TOKEN, and GitHub CLI uses one named GH_TOKEN. Because we already granted elevated permissions, we can use them again.
One last thing…#
The last thing to do is to commit and push the workflow file and the Ruby template file. Doing so will automatically kick off the workflow, and if you’ve done everything correctly, a new release will appear.
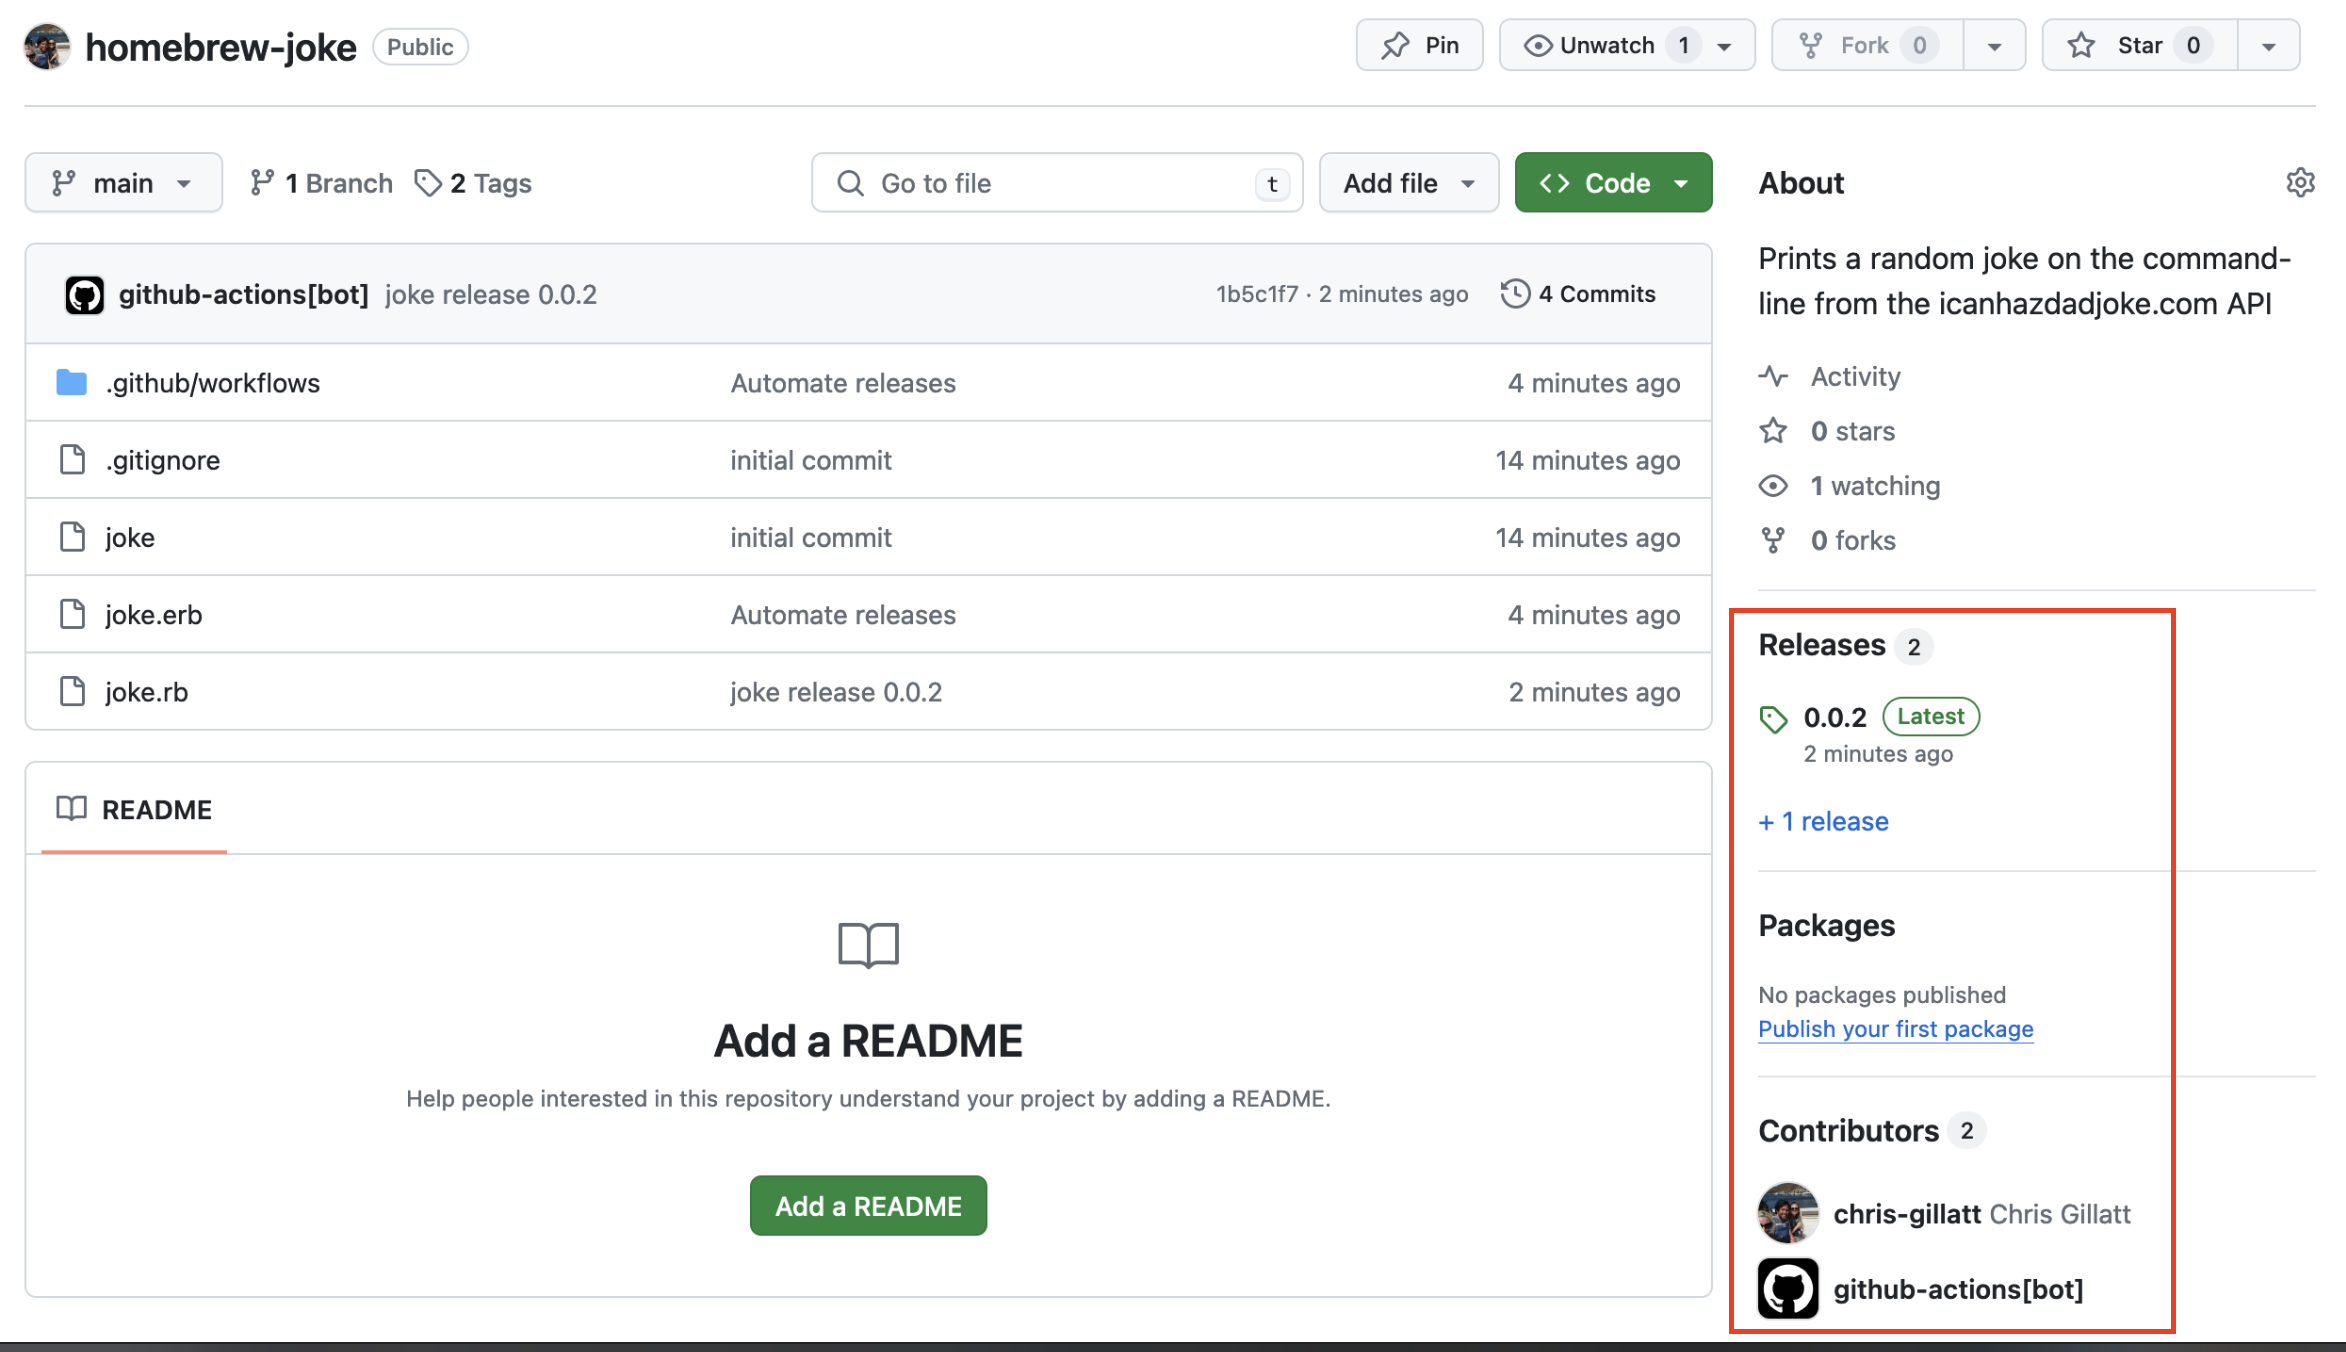
You will notice the GitHub Bot user now appears as a contributor now. This is because it created the new Brew formula file and automatically pushed it back to your repo!
🚀 Nice work
Troubleshooting#
Click to expand for Troubleshooting
Workflow reports error 403
This usually means you’ve forgotten to click save when granting workflow permissions. Check Granting Permissions above.
Workflow reports exit code 1: a release with the same tag name already exists
If you’ve followed along from beginning to end, you will have already published a release containing v0.0.1 and the variable we’re using to automatically increment the version number (GITHUB_RUN_NUMBER) starts at 1. You can just run the workflow again as the second run will become 2. For more information, check the note on Brew Formula File Template.
Wrap Up#
Over the course of this two-part series, we’ve covered a whole lot, so well done if you’ve made it this far.
- In Part I, we learned how to package a tool with a formula file in Ruby for Brew distribution and publish those changes on GitHub.
- In Part II, we automated packaging and releases with GitHub Actions.
This is just the tip of the iceberg for both Brew and GitHub Actions, which are incredibly cool and powerful tools. For me, it’s been enjoyable and rewarding to experiment with them both, and I highly recommend doing so for yourself.
I hope you enjoyed reading, and have fun playing around with your own projects! As ever, feel free to drop any comments below.