

In this post, I’ll describe the current stack of this very blog. Not only that, but it’s almost free to do. The only cost I face for is the domain, and I can even help with getting that for the lowest possible price too. If you don’t need a custom domain, the entire stack can be completely free!
Blog for cheap (or even free!)#
Before diving straight in, it’s a good idea to think about the features you are going to need for your site or blog. I’ve used a few different blog platforms over the years, each with their own pros, cons and feature-sets. However, this current stack consisting of Cloudflare, Netlify, GitHub and Hugo is by far the most feature rich and flexible that I’ve encountered so far. Once set up, the whole thing is just nice to use.
If you’re a super casual blogger and you’re not interested in too much customisation, Google's Blogger is simple, free and secure. Be sure to check out my previous post on the subject.
If you’re into powerful plugins, full drag-and-drop widget interface support, require a database and don’t mind proactively keeping on top of security hardening, Wordpress could be for you.
If you’re like me and prefer blogging using markdown syntax and prioritise security, version control and don’t want a monthly webspace bill, then read on…
1. Static Site Generation#
Blogs of old ranged from hosted gif-fodder and somewhat vulnerable options such as Geocities and Myspace, to full-fat host-it-yourself webservers which come with a host of management and cost overheads such as upgrades and webspace rental. A modern option is to use a static site generator. A static site generator takes your content and your chosen framework, and generates series of flat HTML documents which you can serve directly from your chosen platform, such as Google Cloud or Amazon s3 storage “buckets”. There’s a great article how you can do this over at karlstoney.com if you’re interested in avoiding CI/CD tools such as Netlify or wish to take a more bispoke route.
1a. Hugo#
There are many static site generators these days, such as Ghost, Jeykll and Hugo and hundreds more written in a plethora of different languages. After playing around with a few, I quickly found Hugo to be the right mix of ease-of-use and feature support for me. I was also inspired by some of the availible themes, and some of their out-of-the-box features. More on themes shortly.
Hugo claims to be the worlds fastest static site generator. It’s written in Golang and comes complete with reusable blocks of code - called short-codes - to speed up and simplify page and/or theme construction. It supports the use of HTML where markdown is not enough, but it can also fully generate a site with little to no additional code from you. It supports emojis, math typesets, embedded videos, and twitter posts out of the box to name just a few features. Once your content is ready, Hugo then converts your content into static HTML files which you can then serve as you wish. Hugo is free and open source 🎉
Similarly to its main competitors, Hugo makes local development easy, by allowing you to spin up a local copy of your site to view and test your changes. It has a server mode, which allows you to get live feedback on your edits and changes as you work.
All you need to get started with Hugo is to install it, and install a theme.
1b. Hugo Themes#
Take a look @ https://themes.gohugo.io to browse hundreds of available themes. Some themes require slightly different configuration and build commands, but the all follow the same basic steps:
- Create and change into a new directory
- Do a
hugo initcommand to spin up the framework - Add your chosen theme as a submodule to the themes directory
- Run
hugo serverfrom the root directory

All going well you should have a running copy of your new site running on your local machine in no time.
If you’re new to Hugo, it’s worth taking a read through the Hugo quick-start guide. Be sure to pay close attention to your chosen theme’s Readme for any setup instructions as they can vary. It’s also wise to take note of any commands you may need to run build your production site in CI/CD too. While a simple hugo server is all that’s required to quickly spin up a local copy and run it through the hugo webserver, you may need to run an npm install or set an environment variable your “production” build by your CI/CD platform. More on CI/CD shortly.
2. Source Code#
I’ve chosen GitHub to host my blog mainly due to convenience, but you can use alternatives such as BitBucket, GitLab or other source code control systems which support private repositories. Using a private repository while not a strict requirement, is recommended to prevent anyone easily stealing your work and claiming it as their own. I can’t think of a reason why you would need your site’s files to be public, unless you intend to open source it intentionally, such as if you’re creating your own theme or framework. That said, it’s up to you if you want to make your blog’s source code public or not.
Once you have your code committed to your chosen source control platform, you can them go about automating your deployment, and getting your site live on the internet.
2a. Change Automation (Optional Bonus)#
There may be some changes which you wish to automate, and fortunately these days you get 2,000 minutes free GitHub Actions on the GitHub Free plan. The task I wanted to automate is to update the copyright notice date in the footer each year. Setting up a GitHub Actions automation is reasonably straight forward, and we can complete this given task using some unix tooling, in this case, I used git and sed.
Using GitHub Actions to update a copyright date#
In GitHub, navigate Actions > New workflow > Simple Workflow > Configure
Once in the workflow, I edited the yaml file to contain the following pipeline configuration:
| |
If you’re used to CI/CD systems such as Ansible etc, you’ll be right at home with GitHub actions. If not, here’s a breakdown on what’s going on. This GitHub Action will run on the 1st of January each year, and use the sed utility to find and replace the year from the main Hugo config file, config.toml. It then proceeds to commit the changes back to the GitHub repository with some standard git commands while placing a date in the commit message. It doesn’t need any secrets because it’s acting on its own repo 😄
Custom Domains (Optional)#
This is another optional section, as services such as Netlify and Github Pages come with a free subdomain, which is perfectly suitible to use with your site or blog. Personally I perfer a custom top-level domain to give that little extra neatness to the site. This is the only section which incurres a cost, so if you’re aiming to keep costs to an absolute minimum, you can confidently skip this section.
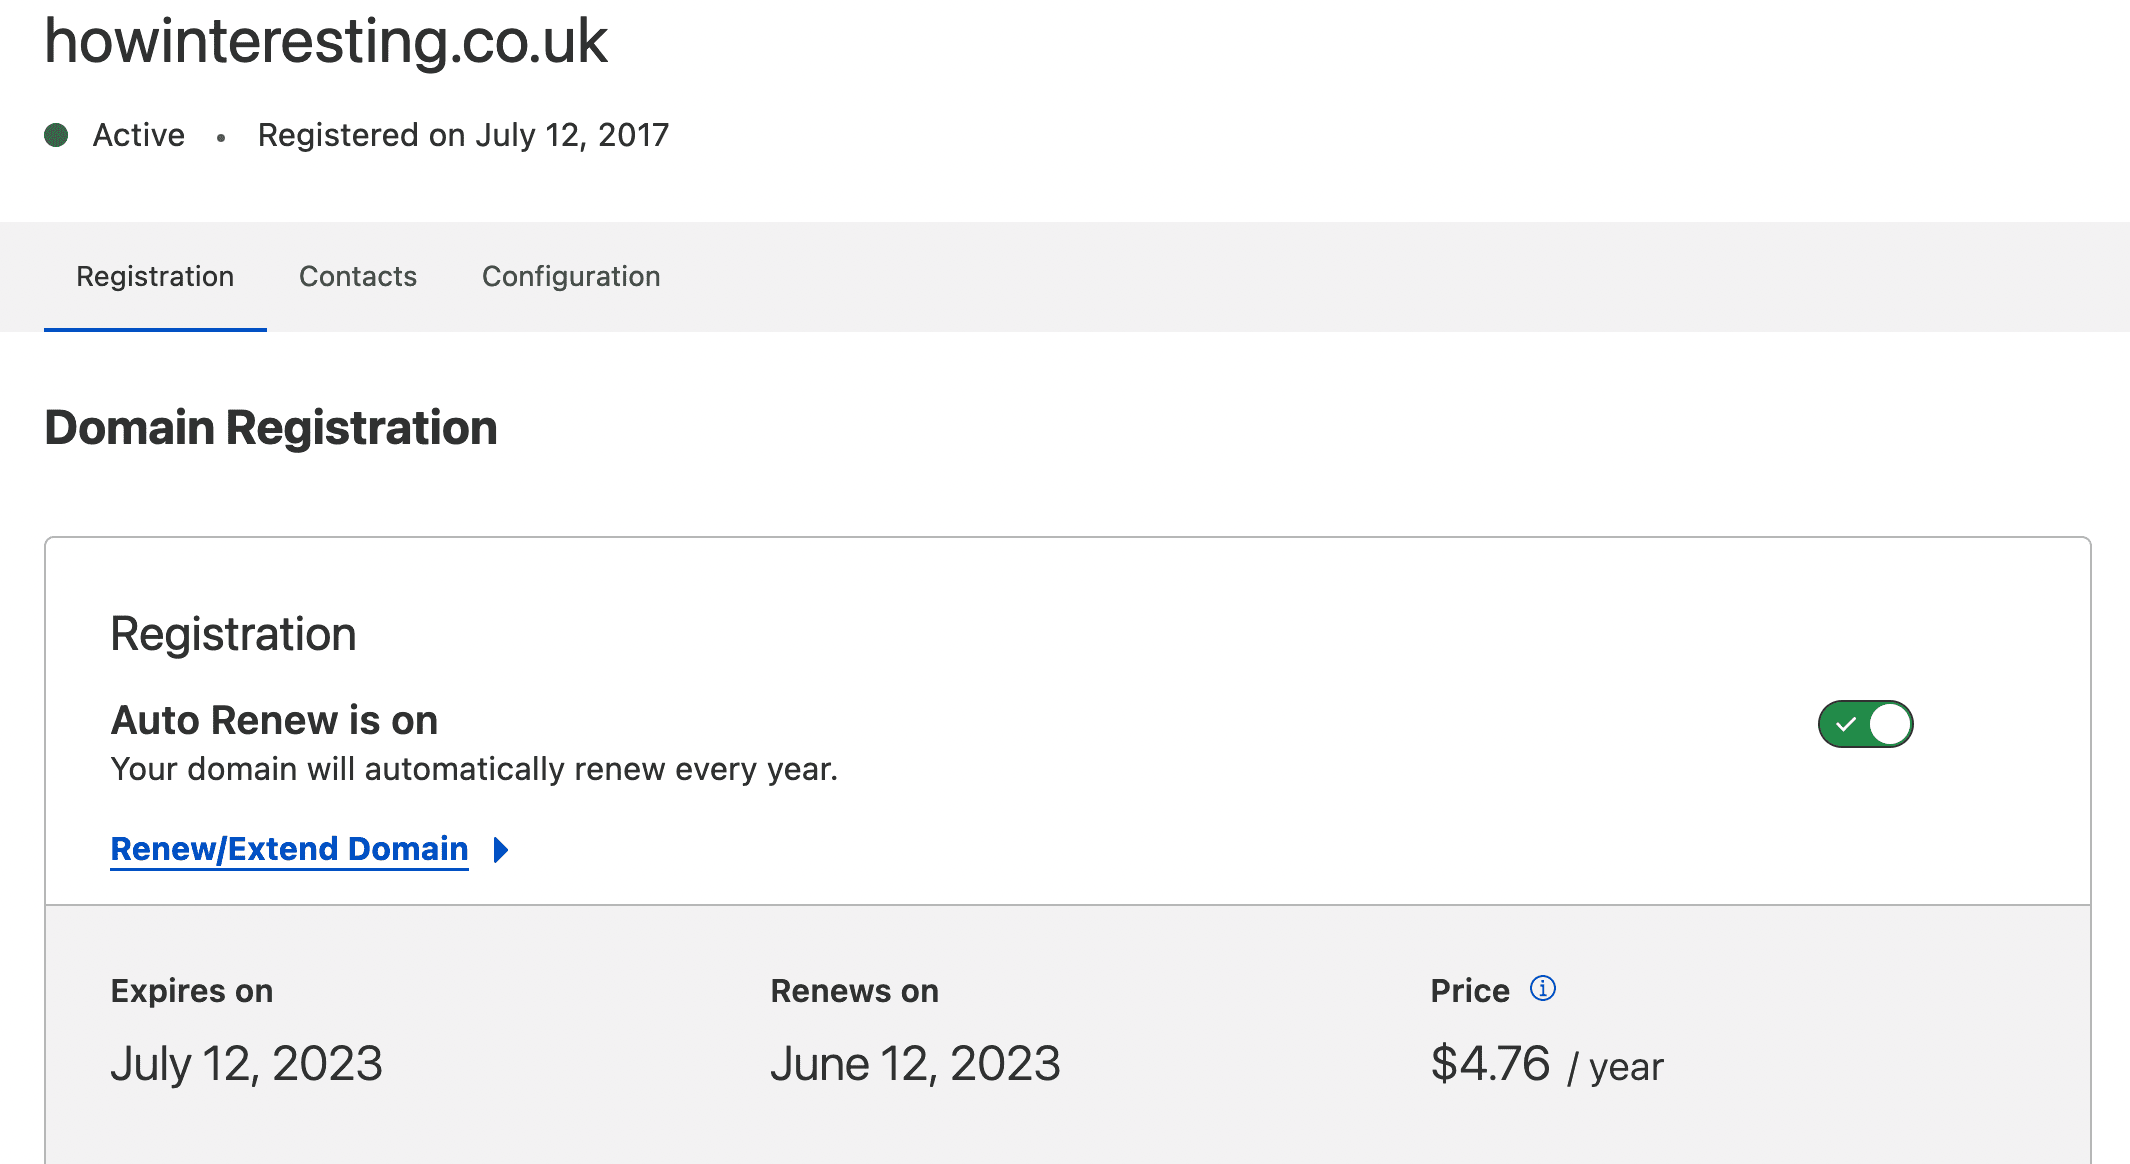
I recommend registering your domain through Cloudflare for several reasons. Not only do Cloudflare offer enterprise-class edge-network security products, they’re also great value for personal users too. Cloudflare do not add markup to their domain prices meaning you get them at the cost price.

This in turn means you can avoid having to move your domain regularly to get the best deal once your honeymoon discount runs out like with other registrars. The howinteresting.co.uk domain costs under $5 per year through Cloudflare, whereas it was around £9 with Fasthosts.co.uk. If you transfer your domain from your old registrar to Cloudflare, you often get an additional year for free (as they round up the difference).
With your cloudflare domain, you get DDoS protection for free, as well as a bunch of free tools and automatic caching to make your blog even more performant. It’s a no-brainer. Check them out @ https://www.cloudflare.com/en-gb/products/registrar.
I’d recommend enabling the following settings to get started:
Automatic HTTPS Rewrites: ON
Always use HTTPS: ON
Auto Minify: JS, CSS, HTML
Brotli: ON
Rocket Loader™: ON
CI/CD & Site Hosting#
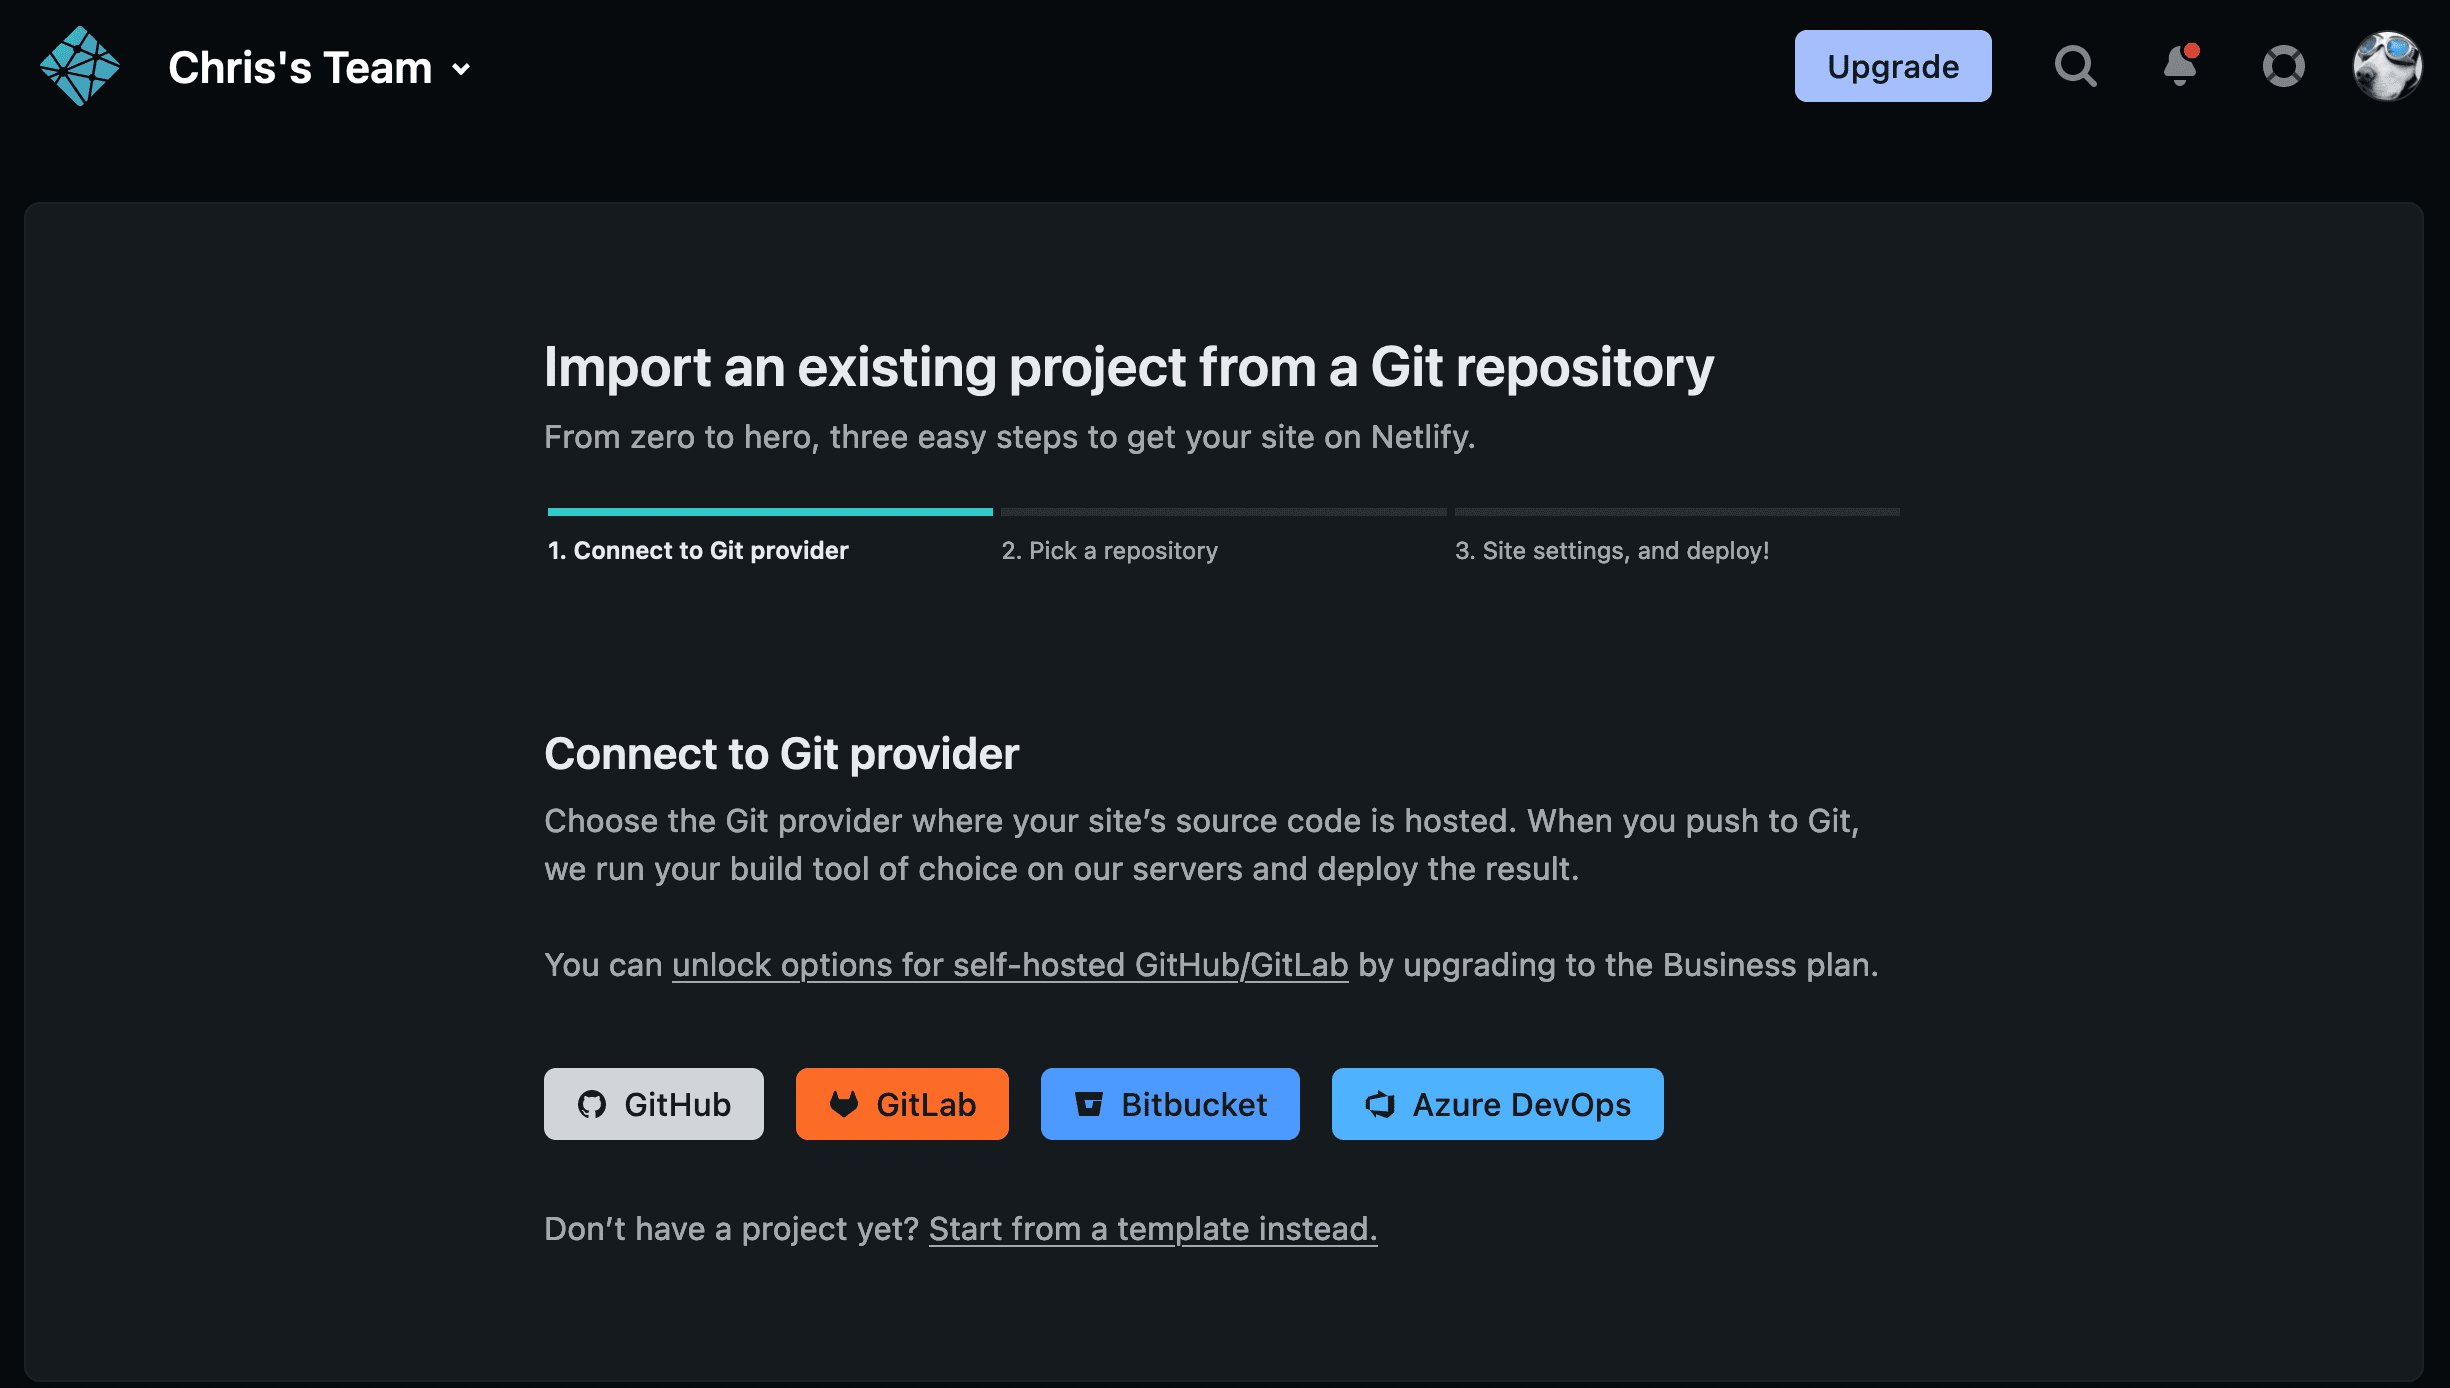
It’s possible to automate Continuous Integration / Continuous Deployment (CI/CD) for free too. It’s just one less thing do have to do when you make write a new article or make changes. There’s plenty of competition in this space, so to the curious I’d recommend checking a few out and seeing which is your best fit. I went with Netlify, so I’ll focus on Netlify here. It’s got a nice clean UI, it’s super simple to use and supports custom domains and private GitHub repos.
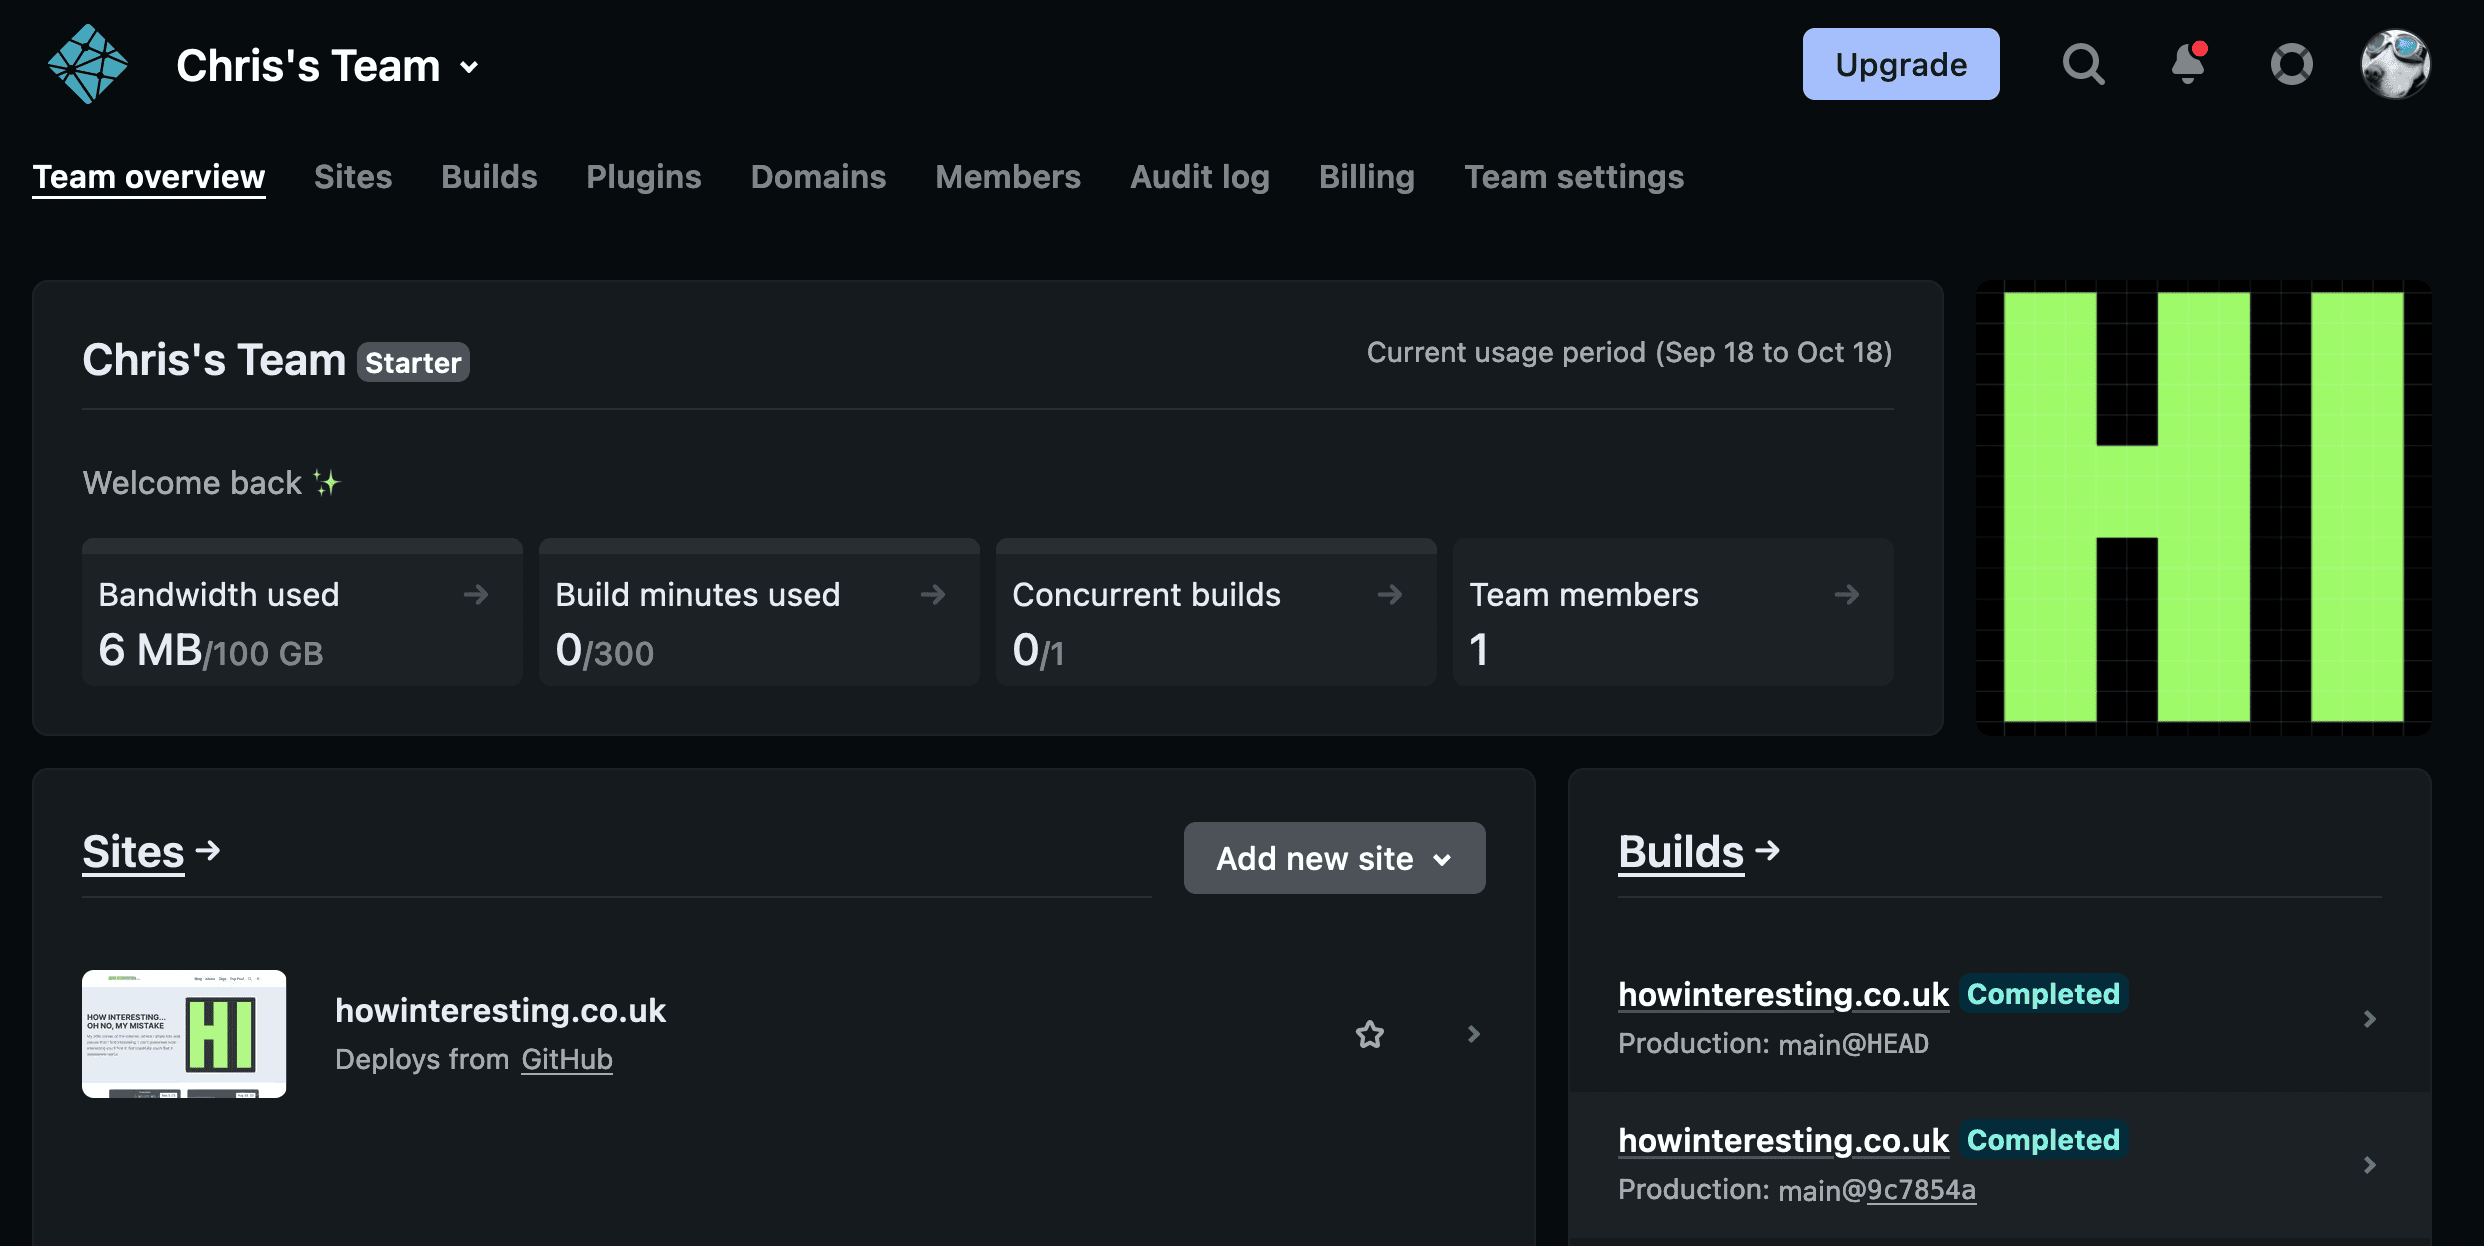
On the free plan, you get 100GB of bandwith and 300 build minutes per month, which is more than enough for a personal blog. All you’ll need to do is to link your GitHub repo to Netlify (you’ll need to authorise access to it if you made it private) and enter your build command. Remember, the build command may be different from the simple hugo serve command you use locally. Check your themes’ readme to see if there are any special arguments or additional commands.
Tip 🚀#
Chances are that you’re working locally with the latest version of Hugo. Be sure to instruct Netlify which version of Hugo to use when building your site, so that your local development environment is the same as the CI/CD environment. You can specify the version of Hugo in the Environment variables section of the build settings. This ensures that you’re not caught out with any changes which could have occurred between versions.

Once you’re set up, you can get your new posts and changes live in a matter of seconds. Simply by committing to GitHub, Netlify will detect your changes and will begin a new build run. Your static files are generated, and on success, Netlify serves your static content immediately. If you choose to use the default subdomain, you can configure this in the Netlify GUI. You can even pick your own if it’s not yet been taken by another user.
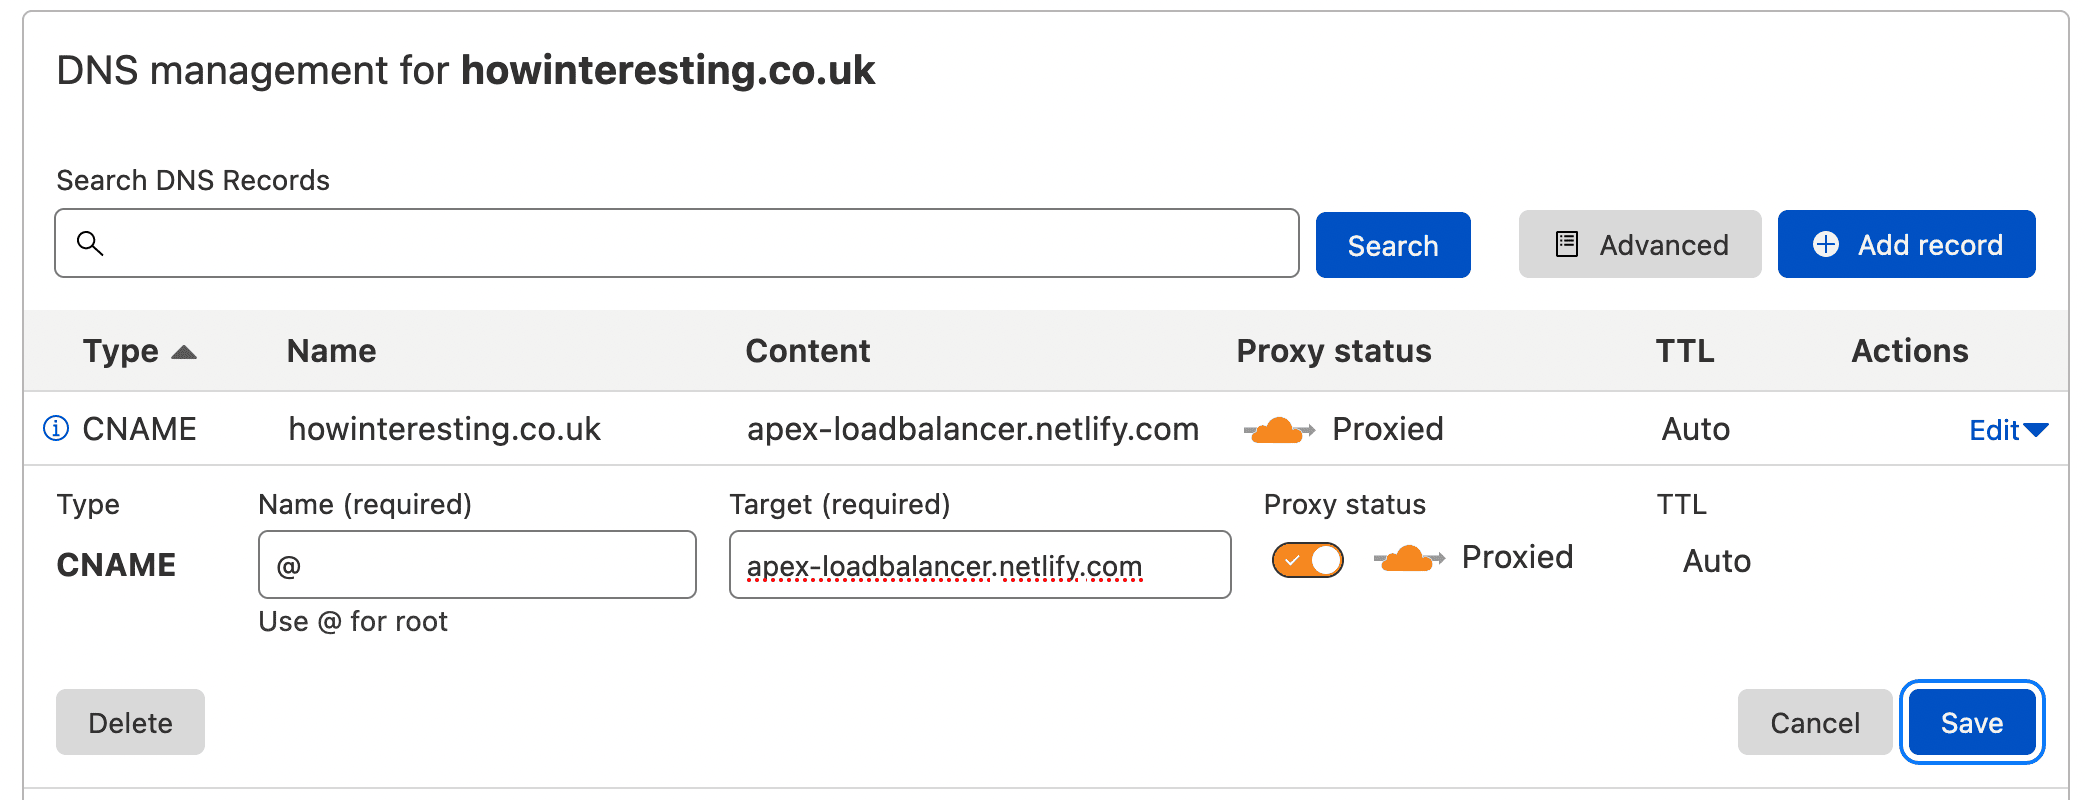
If you’ve bought a custom domain, you can configure that in the GUI. It really is that simple.
Remember to configure your domain with a flattened CNAME as can be seen in the image below if you don’t want to use a subdomain such as www.domain.com or blog.domain.com:
Wrap up#
We’ve covered a lot in this blog, so well done for making it this far 😅
To sum up:
- We’ve used Hugo as a static site generator with a custom theme
- We’ve placed your blogs’ code into a source control system such as Github
- We’ve automated changes to the source code using GitHub actions
- Netlify has provided hosting and CI/CD functionality
- Finally we’ve covered fronting your site with a custom domain through Cloudflare, with performance and security options
As ever if you’ve got any thoughts or suggestions, I’d love to hear them in the comments below 👇