Blogging on a better blog on blogger, probably
Posted on July 17, 2017 • 7 minutes • 1371 words
Table of contents
Why would you even want to do such a thing? Well I will tell you.
Sometimes the simplest platforms are the most frustrating. Enter Blogger.
This next post is going to contain all the customisations I used to make this very blog. Mainly to remind myself, just in case I forget. I’ll probably forget. I will definitely forget. But there’s a couple of ways to make your blog a little less tacky, and it’s not that hard to do either.
This blog is run from Google's Blogger platform , and they like for you to advertise their platform in the URL and footer etc. Forced advertisement annoys me and so I choose to hide it. The reason I originally chose blogger over WordPress (the most popular blogging software in the world) is that Word Press suffers some huge security issues and it requires some manual maintenance or experience with some appropriate plugins to automate. If you’re a casual blogger and just don’t want the overhead, Blogger offers a secure but very basic option.
Creating an account
Of cause Google want you to use your Google account for Blogger. This attaches it to your Google + account, and instantly links it to that. I’m not a fan of someone being able to see my random rants on the internet and get my holiday photos in a few clicks. Even if you know what you’re doing with the permissions, Google has made it a little bit hard to see who exactly can see what. At least facebook somewhat solved this issue with the View As.. functionality . However, what I can suggest to those who wish to maintain anonymity, is create a totally separate Blogger account just for the blog. This might be useful to some people, especially if you’re discussing controversial topics.
To create an account not attached to your google account
- Sign up to your email provider of choice. Pick yourself a name and date of birth you can remember. You might need to recover the account at some point. This account will be an additional account to your ‘usual’ account. On some accounts eg Microsoft Outlook , you can create aliases which we will cover in a separate blog post. This means you can have multiple email addresses and one inbox.. very useful for maintaining anonymity.
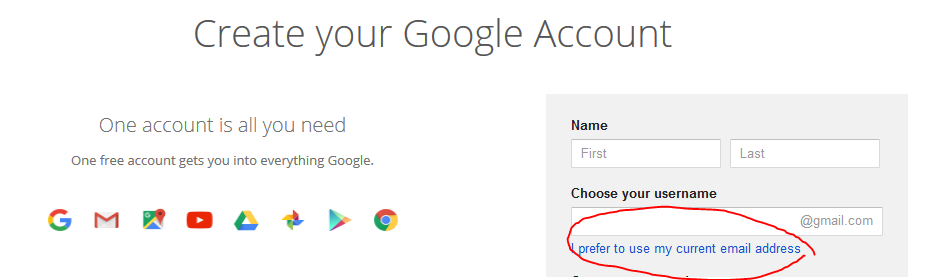
- Now you’re ready to create your blogger account. Make sure you click the “I would like to use my current email address” button. Or click this link . Sign up with the email address or alias you created.
When you finally get to the stage where you create your blogger blog, just make sure you choose the Blogger account and NOT the google plus one. This just means you don’t get the Google+ account. You don’t need it. Nobody needs it.

Choose the name you picked earlier again for sanity and make sure you save all those details in your favourite password manager.
- Email account details (email, password, DOB)
- Google Account (password, the other details same as above)
Finally create your Blog

Picking a template
Personally I like to pick something I’ve not seen (much) before, something striking, hence why this blog is in highlighter-pen green and black currently. My advise to you is play around with the templates and get something which sets it off from the rest. It doesn’t have to be groundbreaking web design, it just needs to be interesting. I mean I broke one of the first rules of WebDev by having a dark background and light text.. so what as long as you’re not posting novels. There are too many blogs which look like they belong to a high-school geography teacher. Avoid anything you’ve seen a million times before.
Chop and change around with the various themes and colours until you get something you like. Blogger is quite limited with it’s basic Themes, but they’re pretty solid and scale well for mobile devices, which is another plus for Blogger.
Custom Domains
Your blogger blog URL will looks something like https://www.mynewblog.blogspot.com . This is fine, but you might like to get rid of the “.blogspot.com” bit to make it a bit more unique and/or professional. Domains can cost as little as £2 per year and just look a whole lot better. I’ve used a fair few domain registrars over the years and some are better than others. Just do a google around and see who’s decent at the moment. Bigger names tend to offer some better services, but not always. I’ve used fasthosts.co.uk extensively over the years, as I like their straight-forward portal and the prices are competitive too.
You can either buy yourself a domain from the likes of Fasthosts or get one through Google. Here’s Google's instructions on how to apply the custom domain to your site. If you bought your domain from an external registrar such as Fasthosts, you’ll need to follow the Connect to your non-Google domain from Blogger section of the above page.
Remove the “Powered by Blogger” attribution
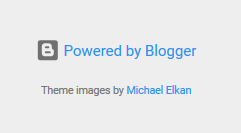
Forced advertising just deserves to be removed. At the bottom of your blog you will see a little advert telling everyone where your blog is hosted. Not a fan, personally.
You can remove it via a couple of methods, but the method I choose, is by via good old fashioned HTML:
- Navigate to Dashboard -> Template -> edit HTML of your blog
- Click into the code - anywhere will do - press the ctrl/command + F button, and search for:
1]]></b:skin>
It’s important that you use the built-in blogger search functionality (obtained by clicking the code before you ctrl/command + F), opposed to the one which exists in your browser, because in this mode, blogger lazy loads the HTML. This means your browser will only ‘see’ the HTML on screen and your search will not turn up anything otherwise.
- Create a new line above the line you’re taken to, and add:
1#Attribution1 {display: none;}
Your code will now look something like so:
1body.collapsed-header.item-view .centered-top-container .blog-name{
2margin-left:40px
3}
4}
5#Attribution1 {display: none;}
6]]></b:skin>
7
8 <b:template-skin>
9 <
Create a Favicon
First of all you need a favicon. There are many favicon generators these days and unless you’re really intent on getting all Photoshoppy on it to make a masterpiece, I suggest you use one of those. I prefer simplicity when it comes to these as you really don’t have much space to play with, although I have seen some very clever use of animation and transparencies if you have the time to be creative. Thankfully, some Favicon Generators support the uploading of your own images, transparencies and animation. Just remember that your images are going to get shrunk to 16x16 pixels, so the more complex your image, the poorer it will look as a favicon. Simplicity is key, unless you’re great with transparencies.
The Favicon Generator I used for this site is http://www.favicon.cc . It’s a very simple, click-the-colour-you-want and click-the-block-you-want-that-colour simplicity. Once you’re done, click download and it’ll helpfully be in the correct .ico format automatically.
Install the Favicon
Now you have your favicon, you can proceed to install it. You’ll need to make sure it’s **under 100K in size to use it on blogger.
- Go to Blogger > Settings > Basic > Favicon
- Upload & save your new icon
When you visit your site for the first time after you change your favicon, you might have to do a forced refresh of you browser to see it. To do this, press CTRL+F5 on windows, or Command+R on a Mac. It should now appear in all it’s tiny glory.
Go you! 🎉