

QNAP - Add a Let's Encrypt SSL Certificate for HTTPS
Posted on June 24, 2021 • 4 minutes • 776 words
Table of contents
There’s a reasonable debate about whether you should expose your QNAP - or any NAS for that matter - to the outside internet directly. Anything on the internet is an attack surface, and nothing is completely un-hackable. Sure we can harden security with SSL/TLS, Web Application Firewalls, DDoS protection and Bot scoring, but any device which is publicly available will always provide an element of risk. This article attempts to describe one method for hardening security for your NAS, cheaply (well, free).
Apply a Let’s Encrypt Certificate
A Let’s Encrypt certificate can be configured to support both your free DDNS domain myqnap.myqnapcloud.com and your personal vanity domain too, such as qnap.howinteresting.co.uk.
There’s a couple of ways of getting an SSL certificate for the QNAP, and as to be expected, the easiest method costs you money: The paid QNAP cert. I suggest you ignore that. I’m with Let’s Encrypt in believing that security should be standard for all, and it’s something we all benefit from. Let’s Encrypt are a non-profit Certificate Authority with a long standing record of providing free certificates to hundreds of millions of websites around the world. You can read more about the project here.
Let’s Encrypt certificate through QNAP Security Config
If you have the QuFirewall running (recommended) with some strict access rules (also recommended) such as UK only for example, you’ll need to prevent the ACME challenge from being rejected. Easiest way to do this is to either stop the app or switch the Firewall off while this work is performed, otherwise you’ll see an error with the challenge and the certificate issue process will fail.
-
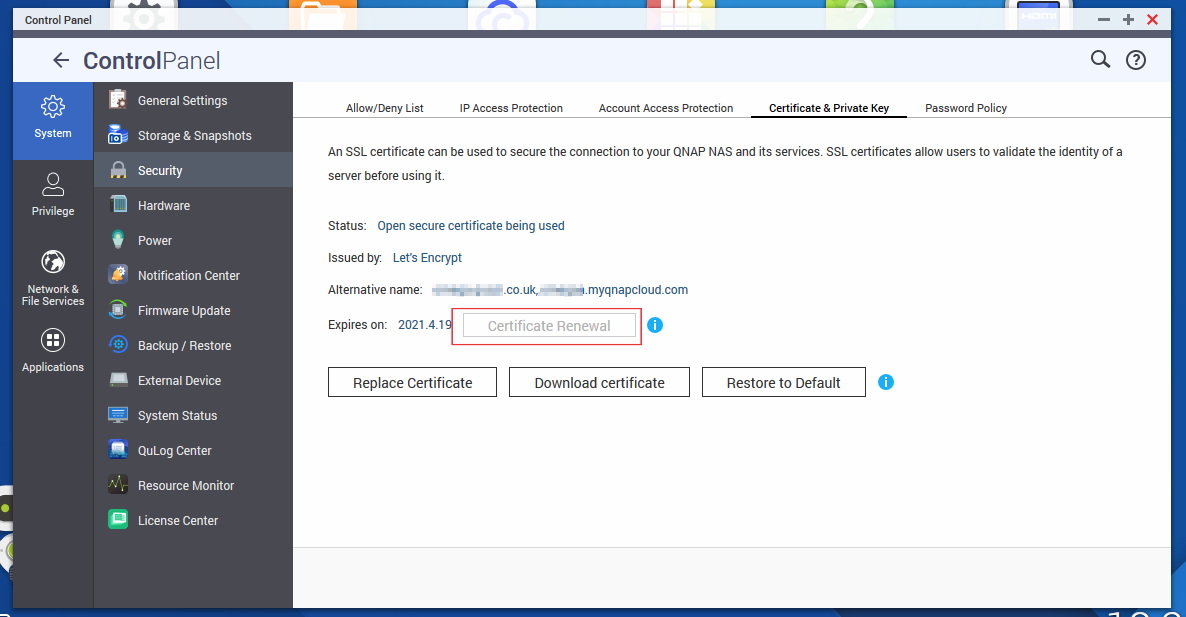
Navigate Control Panel > Security > Certificate & Private Key

-
Click on Replace or Create Certificate (depending on if there’s one there already or not)
-
Enter the following details in the prompt:
- in the first box enter your Custom Domain
- enter the email you wish to associate the certificate with
- under the third box entitled “Alternate Addresses”, enter your myqnapcloud.com address, such as myqnap.myqnapcloud.com
- Click save and that should be all you need to do
Tip 🚀
If you’re running into issues, see the troubleshooting section below ⬇️
Certificate Renewal
You may be able to renew the certificate with a click of a button when you’re near or past the expiry date.
Remember to first switch off the firewall or the ACME challenge will fail and you only get 5 attempts before a one hour ban.
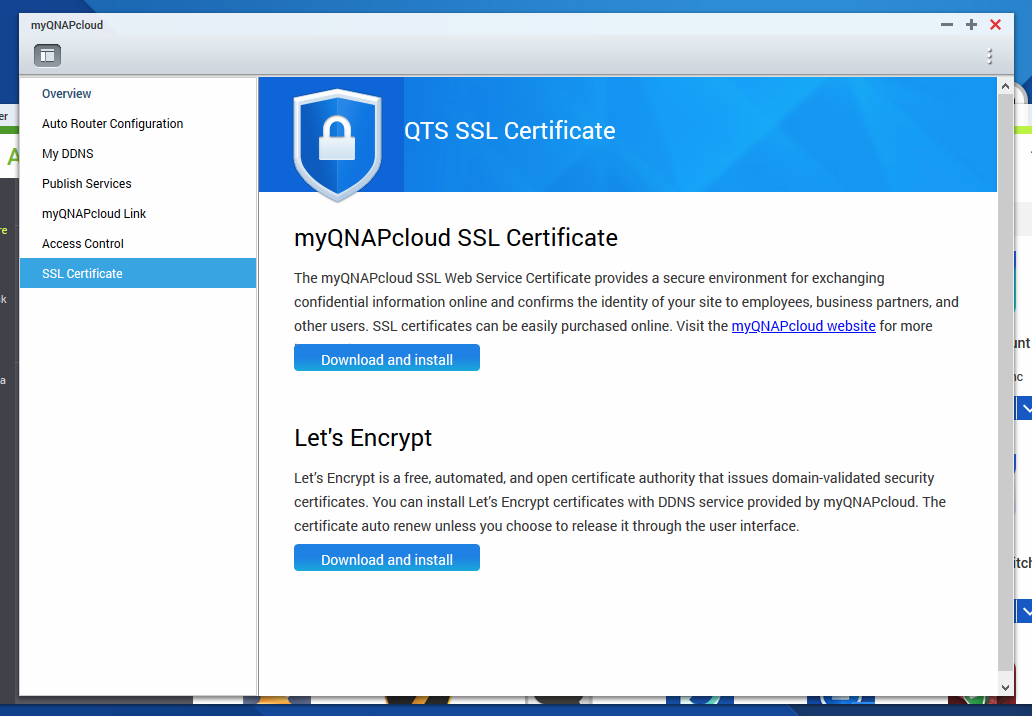
Let’s Encrypt certificate through myQNAPcloud
This supports myqnapcloud.com domains only. For custom domains, see above ⬆️
Ensure you’ve installed the myQNAPcloud app through the App Centre :thumbs_up:
-
Select the SSL certificate menu on the left-hand side of the window
-
Select Let’s Encrypt > Download and install
-
You’ll then be required to input a valid email address which Let’s Encrypt will associate the certificate issue with. The address will not be written to the certificate don’t worry
-
Make sure you tick the option to auto-renew as this saves a bit of time manually renewing it every three months
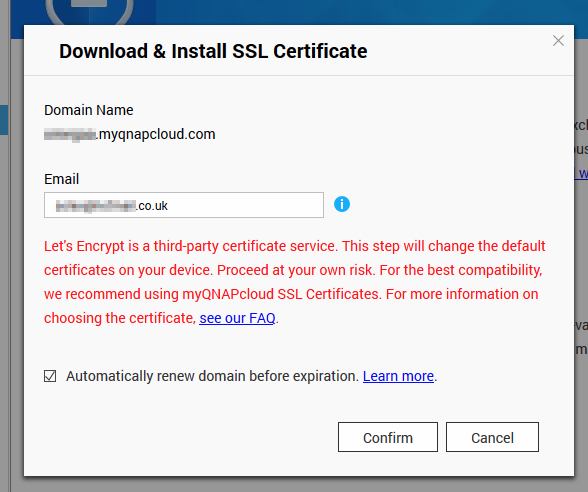
- Click confirm and all should be done
Troubleshooting
Let’s Encrypt only allow 5 failed certificate issues per hour. If you reach this point you’ll have to wait for an hour before trying again.
- If for some reason the certificates are failing to issue, ensure that port 80 is open on the router and is port-forwarded to the QNAP correctly
- Check firewall logs to see if the challenge is being blocked
- Check any router-level advert blockers are not blocking the ACME challenge by accident by viewing the dnsmasq logs
If you ended up with a Bitdefender free certificate
To ensure that your new certificate is showing correctly to new devices, you’ll want to make sure that you clear any Bitdefender free certs which your machine has cached to allow access to your https domain (if it expired or if you’re setting this up after a restore / new NAS)
You need to delete these certs in two different places;
Firefox
Options > Privacy & Security > Security > View Certificates
Windows 10
-
Start > Manage Computer Certificates > Action > Find Certificates
-
Delete the Bitdefender Personal CA.avfree000000 certificates you find and restart the browser
Verify the certificate
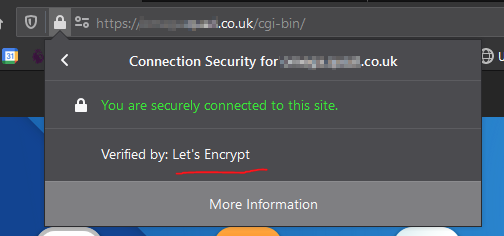
Once you’ve removed those items above, you should able to verify that your new Let’s Encrypt certificate is showing through Firefox:
-
Click Padlock then the right chevron
>
-
Notice that Verified by should now show Let’s Encrypt rather than the Bitdefender Unknown verifier one
-
Click More Information
-
Click Security and you can now see your new certificate in Firefox

It’s the same principle for the other browsers, I’ve just not had time to check the exact steps